How to
How to use Wifi Hotspot in Laptop with Ethernet Connection

In the Era of the internet, you will hardly find a person who doesn’t use the facility of the virtual world. There are various ways to connect to the internet, such as mobile data, broadband, WiFi, hotspot etc. I guess we all have used our mobile as a hotspot generator to share internet connection. Almost all the digital devices like mobiles, laptops, tablets are capable of doing the same task. Using our laptops as a Hotspot base isn’t that complicated, maybe there is no single click hotspot generator but the task is definitely easier than your expectation.
In this article, we will discuss briefly about turning your laptop into a Wi-Fi hotspot. Let’s find out how to use your laptop as a Wi-Fi hotspot step by step.
There are plenty of ways by which you can achieve the target. In this article I will be providing you a couple of them, choose the most convincing way for you.
Connectify for Windows Users:
Connectify is a useful computer app consists of different features and mainly used for WiFi hotspot generation. If you are a Windows user follow the steps mentioned below.
Step 1: Open your browser & search connectify Hotspot.
Step 2: Download the latest version of this app on your laptop.
Step 3: Install it.
Step 4: It will ask for a WiFi name & password, set it as you want. (Especial character or Emojis can be added in the name).
Step 5: Select the ad blocker option & press start Hotspot. (The Ad Blocker will help you to save bandwidth, battery & cost).
Step 6: Here you go! Your device is totally ready to serve. Connect as many wifi enable devices as you want.
Hope you have no confusion about it. Definitely the easiest way available. So, why are you waiting for, download the Connectify app now.
If You Are A Mac User:
In case of MacOS, you can use your laptop as a WIFi hotspot too. But if the Mac is connected to a WiFi then it can’t be used as a hotspot generator. Your Mac can either be connected to a WiFi or can be used as a hotspot generator, but both can’t be done at the same time. But if you are using Ethernet for your laptop’s internet connection, generating a hotspot from the Mac won’t be a problem. Yes! In this case, you can do so. Let’s find out how to do so without using any external plugin or app.
Simply follow the steps mentioned below.
Step 1: Go to System Preferences. You will find it in the top left corner of the display after clicking the Apple logo. (After clicking a new window will open).
Step 2: Click on the Sharing button there. You will be provided with a list, click on Internet Sharing.
Step 3: Take a look at the right corner of the display, you will see some options of your internet source. Select Ethernet.
Step 4: Make sure WiFi is selected.
Step 5: This will generate the WiFi hotspot and external devices can connect to it easily now.
Step 6: Configure your settings accordingly by clicking on Wi-Fi Options.
Wi-Fi to Hotspot in Mac:
Well, this scenario is not impossible at all.
Especially while traveling using Wi-Fi to connect to the internet is a preferable way. Let’s find out how to generate WiFi hotspot from your Mac while it itself connected to another WiFi.
Basically, Mac’s built-in system either can be connected to a WiFi or can be used as a hotspot generator, but to do both at the same time, you will need to purchase WiFi Network Adapter (Buy it from Amazon). This adopter divides the interface, one interface receives the WiFi signal while another one broadcasts it.
Once the adaptor has been connected and installed, follow the steps mentioned below:
Step 1: Click on the Apple logo on your display and go to System Preferences.
Step 2: Click on Sharing.
Step 3: A list will be provided to you. Click on the Internet Sharing option.
Step 4: Select your internet source. Here select the Adaptor option.
Step 5: Now your hotspot will be generated, you can connect external devices.
In case you Don’t Want to Buy An Adapter:
Yes, we can definitely save the money for you. But I will recommend you not to use as it is not a reliable way for efficient using. The internet speed won’t be satisfying at all.
Here to share the internet connection via laptop we will be using Bluetooth PAN (Personal Area Network). The initial stage of Bluetooth pairing procedure will test your patience, it actually takes a bit long time. But if you have no other option only then the PAN technique may give you a bit relief, else it is not a convenient way.
If You Are A Linux Lover:
There is no way you can stop a Linux user do such stuff. The Mac & Linux works similarly. You cant do both Connected to a WIFI and sharing a hotspot at the same time. To do so you will have to buy an Adaptor, available in all online stores.
Follow the steps to create a hotspot from the laptop having Linux OS:
Step 1: Click on the System Menu. You can find the option on the right top side of the display.
Step 2: Mention the network you are connected. (If you are using Ethernet, select Ethernet. In case you are using the Adaptor, select the adaptor option).
Step 3: Click on Wi-Fi Settings.
Step 4: Click on the option Use as Hotspot.
Step 5: You are all set to share your internet connection.
There may be other ways to achieve the target, we have mentioned the easiest among all according to our research. If you feel we are missing a useful technique, don’t forget to mention in the comment section.
Tips Tricks
How to install iOS or Blackberry apps on any Android phone

Do you want to run an iOS or blackberry app but only have an Android device? Here are some ways to run iOS apps on an Android device.
Android is a mobile operating system, developed by Google, based on the Linux Kernel and designed primarily for touchscreen mobile devices such as smartphones and tablets.
It has dominated the smartphone market since its inception and currently has two billion monthly active users , and has the largest installed base of any operating system.
Prior to Android,we witnessed Java, Symbian and Blackberry operating systems along with the iOS, which continues to be a competitor to Android till date.As for Java and Symbian, these Operating Systems have more or less become obsolete with most of its users opting for an Android or an iOS-powered smartphone.

The variety of applications or apps offered by Android on its Android market, commonly known as the Google Play Store, is one of its biggest USP and the reason behind its popularity.
Running Java apps on Android
Most java apps have their android counterpart with a better interface but who can forget those days where we were used to Opera Mini on our slow 2g networks.Or how can we forget those serious football sessions in the form of Real Football?Well,the trip down the memory lane is not too hard as here are few methods by which you can easily revive the memories of the good old days on your Android smartphone.
1- The first and foremost step involves rooting your phone. The method involves copying a file to your system directory and so you must have a root access.This method will let you run the java apps with the .JAR or .JAD extension on your android device using a third party Emulator
2 – Once you have obtained the root access to your phone,you need to download an appropriate emulator from the net to your phone.These emulators are not available on the Play Store and hence you need to download them from the developers’ website.
3 – PhoneME, JBED, JBlend and Netmite are some of the most popular emulators while PhoneME is considered to be the best among them in terms of success.
So let’s just take a look at how PhoneME works:
a) You need to download “phoneme feature” apk file from the developer’s website along with OpenIntent File Manager apk and copy these files onto the root directory of your phone.
b) Install both apk files onto your device.
c) Download JADGen on your computer.This converts the JAR file into JAD.
d) Copy both the JAR and JAD files onto your android device in the same location.
e) Run the JAR file using phoneME and selecting the file on your phone.
Running iOS on Android
The iOS is another big name in the smartphone domain and offers a tough competition to the brainchild of Google. There are many such apps that are exclusively available for the iOS users. Apple iOS is stable, and not everyone gets into that ecosystem, you need any Apple device to experience one. Unfortunately, not everyone could afford for an Apple device, because of its jaw-dropping price tag. If you are an android user,yet an Apple fan,you have no reason to worry since you can now run iOS apps on your android device by following a few simple steps.
The two most used emulators are Cider and Imeu.The apk files of these two emulators are available on the developer’s website.
Cider is the first choice when it comes to running iOS applications and games on your android smartphone. With this tool, it will be the breeze to get all your favorite iPhone apps to your Android device without any hassle. Best part it won’t be charged any dime to get this iOS emulator for android.
Make sure you have enough installation space before you proceed with the installation process.For the best iOS experience, you must disable any android launcher that is installed on your android smartphone.
Since this apk isn’t from the Play Store, you need to Enable app installation from “Unknown Sources” under Device Administartion in your phone’s settings. Once you’ve enabled this and installed the Cider apk, you’re good to go and enjoy the experience the features of iOS on your android smartphone.
Running Blackberry apps on Android
Blackberry was initially a hit in the smartphone market, especially among the businessmen. However, it suffered a major setback when Android entered the market and started gaining ground.
The Blackberry Messenger or the BBM was one exclusive Blackberry app that stood out from the rest.This was the only app that continued to be a hit among its users,despite the success enjoyed by WhatsApp. Eventually, BBM made its way on the android platforms and Blackberry was now fighting a lost battle.
In 2015, BlackBerry re-focused its business strategy and began to release Android-based smartphones, beginning with the Blackberry Priv slider and then the BlackBerry DTEK50. On September 28, 2016, Blackberry announced it would cease designing its own phones in favour of licensing to partners.
In an attempt to bring the best features of Blackberry to non-Blackberry devices, the Blackberry manager was created by an XDA Senior member and creator of the Google Play Store.
The Blackberry Manager is not an emulator but it brings the best features of Blackberry like the keyboard,calendar and Blackberry hub, to name a few,on your Android device running on 5.0 or higher.
It does not require root access and can be downloaded like any other apk file. With the Blacberry Manager, you can download free versions of various BB applications, patch them and keep them updated.
Android is an incredible platform meant for all kinds of users. But as they say “There is always room for improvement”, we can expect that there are certain apps that are available exclusively on iOS or other platforms. However,much of this platform issues have been solved, thanks to the emulators, which have enabled apps to function on most platforms.
The developers of the emulators have done a fantastic job in the past and are still working on it to improve the user imterface and the efficiency of the emulators on the smartphones.
Computer
How to Turn ON and OFF Windows Defender in Windows 10

The simplest way to turn on and turn off the Windows Defender manually. A step by step approach with images along with its importance and many facts related to anti spyware programs .
Most antivirus programs will not provide complete protection so you must learn which one fits your requirements. There are a variety of free spyware removal programs offered on the current market, which might be used to eliminate computer viruses. Hence, before starting using your system for surfing, it is important to make its online security powerful. It is not possible to run both in precisely the same system. However, it’s feasible to use an Anti virus. If programs or downloads seem to crash in the middle of usage, it may be malware. It is cited one of the optimal/optimally spyware removal applications readily available today.
Windows defender is easy to use and familiar to the vast majority of users, and this means that you should not have some difficulties with it. Furthermore, there are other tools, but they are less common, and we will not mention them inside this post. There are lots of freely downloadable anti-spyware tools which may be found on the net.
Besides that having a built-in and totally free antivirus, it is a crucial thing for people who would like to protect their Windows 10 Computer. So you do not have to get in the problem of installing antivirus software anymore.
But since Windows defender is a built in tool we cannot uninstall it whenever we want like we do for the antispyware programs that are the reason why it is a must to know how to turn on and off windows defender for every windows user.
How to turn windows defender ON in Windows 10
If you want to turn windows defender ON that’s easy, you just need to follow the below given steps :
If you’re using some anti-virus in your windows PC chances are there that windows defender in your PC is turned OFF and to turn ON windows defender first you have to uninstall the antivirus from the control panel

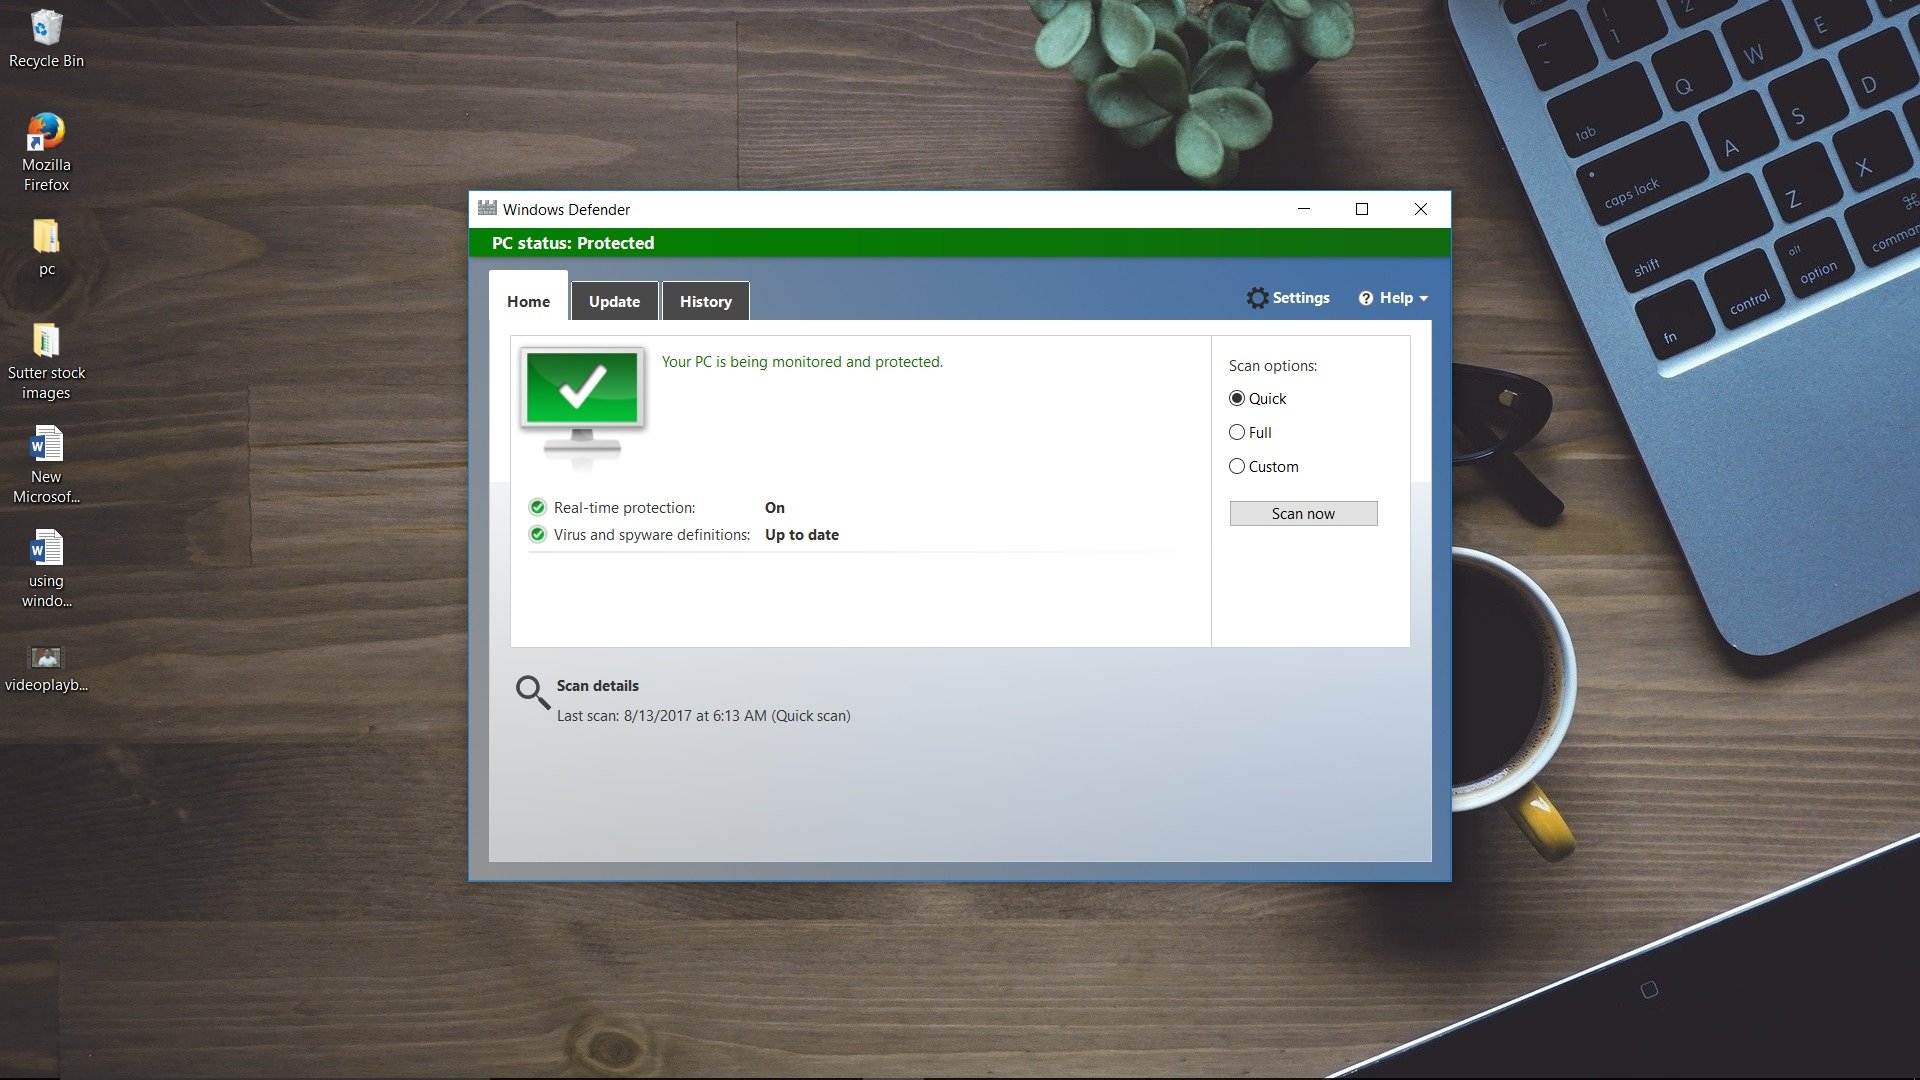
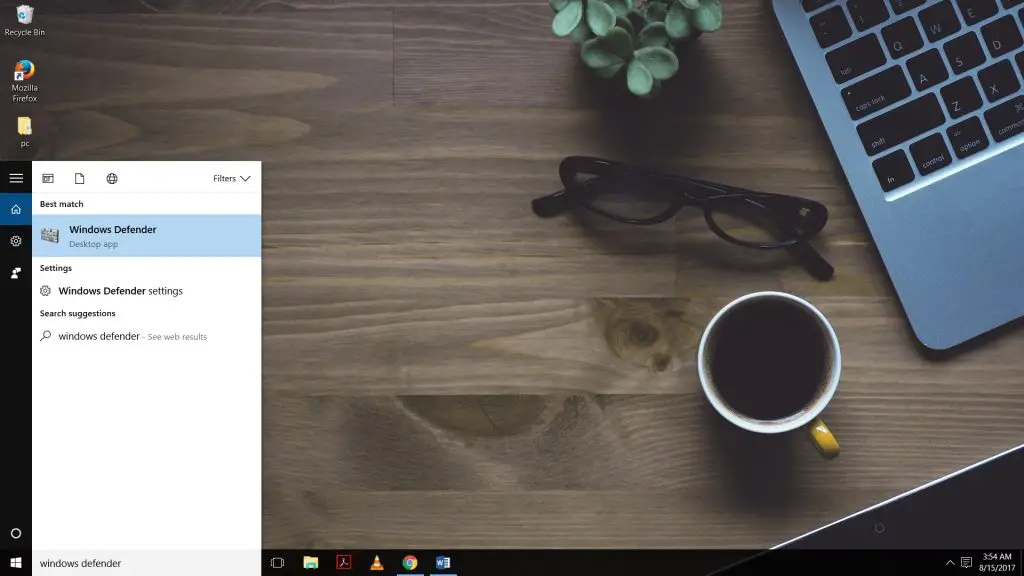
Launch windows defender from the start screen by typing windows defender in the start menu .
Now hit the large Red Turn on button. The defender will begin monitoring and protecting your windows pc.

How to turn windows defender OFF in Windows 10
The easiest means of disabling Windows Defender is via the program itself. Since Windows Defender works for every single account, your children are going to have the exact security. They should be good for the average PC owner out there. He or she has its advantages and disadvantages. He or she can even help out if you are not using it as your primary antivirus software. We don’t suggest uninstalling or disabling Windows Defender, particularly if your system is connected to the internet.

Click on it, and you’ll acquire such a window.
If you scroll down, you’ll discover a choice to add exclusions that can be utilised to exclude any particular file, folder or process that you know is secure and being blocked by Windows defender continuously. In such instances, you should make some smaller modifications to your Proxy server. User Account Control prevents users to create adjustments to the Windows system that may damage the trustworthiness of the system. It is going to then scan your system for virtually any malware your key antivirus software may have missed.
If you want to turn windows defender off that’s not a piece of cake you can do that temporarily from the start menu as described above how ever when you reboot the PC Windows defender turns itself on
How to turn OFF Windows Defender Permanently
Now to turn windows defender OFF permanently use one of the following procedures
1. If you’re using Windows 10 or any other enterprise variant, such as Windows 10 Enterprise or Windows 10 Education, you can also disable Windows Defender using the Local Group Policy Editor from your computer.

a) Use the to open the Run command box by using Windows key + R keyboard shortcut
b) Now we need to open the Local Group Policy Editor. For that type gpedit.msc and click OK
c) Browse the following path:
Computer Configuration > Administrative Templates > Windows Components > Windows Defender
d) On the right, double-click Turn off Windows Defender.
2. You can also disable the windows defender by using the registry

For that just open the Windows registry by typing regedit in the run command box and click OK to open the registry.
Browse the following path:

HKEY_LOCAL_MACHINE\SOFTWARE\Policies\Microsoft\Windows Defender
a) If you don’t see DWORD DisableAntiSpyware, right-click on an empty space, select New, and click on DWORD (32-bit) Value.
b) Name the key DisableAntiSpyware.
3) Double-click the newly created key, and set the value from 0 to 1.
Well, that was the procedure to disable windows defender. However, we highly recommend you to keep it turned on to stay safe .
Importance of Windows defender and Securing your PC
However Windows defender is not completely robust to withstand against worms, viruses, Trojans and other malware that is similar. The infection of Safety Defender should result in the inadequate security of your existing antivirus. As a consequence of this, you may want to supplement scans made by Windows Defender with net scans using a distinctive antimalware engine.
Bear in mind which you also require antispyware software. It is vital that you receive anti-spyware software at once if you don’t have it. You may use antivirus software to eliminate the virus. Most antivirus programs have a firewall; therefore it will safeguard your computer from hackers.
Generally, many people aren’t acquainted with this computer program. To solve and knock out those annoying computer viruses Microsoft has added windows defender to its OS
An additional measure which you can take is to make user accounts that don’t have permission to install or uninstall programs. In the event the user wants to install the Windows Defender software then you have to remember this security program includes a WGA validation. Following this validation procedure, the Windows OS user will have the ability to install this program. For that, one should generate PDF files and offer exceptional extensions to be able to cover specific requirements. At this juncture, you should format the hard disk and reinstall the OS. Based on this it is possible to format the system when opting to run NTFS. Lots of the scan-only forms of anti-spyware software are available at no cost.
-

 Tips Tricks7 years ago
Best Antivirus 2020 for Samsung, Nokia, Oppo, Vivo & OnePlus Phones
-

 Tips Tricks7 years ago
Top Free VPN for Android Mobile Phones in 2020
-

 Tools8 years ago
Fastcomet Hosting Review 2020 – Know why it’s Better than Others
-

 Tips Tricks7 years ago
How to install iOS or Blackberry apps on any Android phone
-

 Tips Tricks7 years ago
Top 7 Cryptocurrencies to Purchase in May 2020
-

 Tools8 years ago
Revcontent Review – Best Content Marketing Platform in 2020
-

 Tools8 years ago
10 Must have Social Media Apps for Bloggers
-

 Tools8 years ago
GreenGeeks Review 2020 – Cheap, Reliable and Blazingly Fast

